Showing posts with label cheapfood. Show all posts

Thursday, 11 August 2016

Cheap Chicken Fajitas


We love a Mexican night in our house. It certainly helps with the decision of what to have for tea. As with my Banging Bargain Burritos, I wanted to show you with the same few spices you can make the fajitas without buying the kits. Don't forget to buy the wraps from the bread aisle, not the section near the Mexican food kits they do cost more. These are so tasty and can be altered to almost anybody's liking. Like B.B.Q fajitas? Use half B.B.Q sauce and half passata. Like them hot? Throw in some jalapenos or up the heat of the chilli powder. Play around with food and make it your own, experiment with flavours and involve the family. Have a themed night each week to help with tea ideas, we tried Mexican Monday, Meat free Wednesday and Fish Friday!

For the fajitas:
3 chicken fillets cut into strips
3 peppers sliced
2 red onions sliced
300ml passata 
3 tsp cumin
3 tsp garlic powder
3 tsp paprika
3 tsp mild chilli powder
Tbsp oil
Wraps

After you cut the chicken shake all the spices onto the meat to marinate for 30 minutes or more covered in the fridge.
In a frying pan with the oil fry off the chicken for 15 minutes.
Add the peppers, onions and passata and cook for a further 15 minutes until the sauce reduces.
Spoon the mixture into a warm serving dish and take to the table with the wraps, salad and trimmings for everyone to make their own.

Tuesday, 9 August 2016

How to deliver a cheap and tasty meal

Another tasty, cheap and filling recipe courtesy of my lovely dad, you will be famous soon dad! He's always told me how he fancies a plate full of liver and onions-the very thought always made me want to be sick-but as he's been such a great dad, I put my queasiness aside for a day and made him the treat he's been wanting. I read that if you were to get liver to avoid pigs liver as it could be quite bitter, I have since realised this is all just personal preference. Pigs liver is cheaper and if you don't like the taste if you soak it in milk for 30 minutes it's supposed to combat the bitterness. I used lambs liver, it cost £1.34 and there was enough for two big plates full. As well as being cheap, it's actually quite good for you, it contains a large amount of high-quality protein, an easily absorbed form of iron and all of the B vitamins-including B12 and folic acid in significant amounts. I have to say I didn't like it myself however, the gravy was delicious and my dad said it was the best he had tasted so that's good enough for me!

Lambs liver
Onion sliced
2 rashers streaky bacon
300ml beef stock
Tbsp flour
Worcester sauce
Tbsp tomato ketchup
Tbsp oil
 In a frying pan on a medium-high heat with the oil, fry the onions and chopped bacon until the onions are soft and the bacon is crispy.
Slice the liver into cm thick strips and fry for 2-4 minutes until cooked and remove from the pan and keep warm while you make your gravy.
  Add the flour to the onions and bacon and stir, gradually add the beef stock stirring constantly so you don't get lumps until it's all added. You may need to keep adding more water depending on how thick you like your gravy. Add a dash of Worcester sauce and the ketcup and stir in. Return the liver to the pan and let bubble away for a couple of minutes.
Serve on its own or with a pile of mashed potatoes and peas. Enjoy!

Tuesday, 19 January 2016

Chilli gone barmy and nom nom nachos

With the cold spell we are having at the moment, (it makes for some beautiful pictures) this tea is perfect. It was going to be a chilli con carne, however I forgot to buy some of the ingredients and had to improvise and do you know what? It tastes better for it! This is a good one for this time of year as it's filling, healthy and cheap! Have it on it's own, with the nachos, jacket potato, rice, pasta or chips, it's your choice. I have a very slap dash approach to cooking just lately and want to stress to you all even though I give you a recipe, feel free to play around and make it your own. The nachos make a lovely supper or an accompaniment to a Mexican meal, these however are probably not as good for the waist line. Then again with the weather at the moment we need a little fat on our bones.....right?

Nachos
Tortilla chips (Asda's own brand are only 46p for a 200g bag!)
Rocket (optional)
Sweet chilli sauce
Cheese grated

Layer the crisps and cheese and grill until the cheese melts
Dish up on top of the rocket (it makes you feel less guilty)
Dribble on the sauce and enjoy!
My son Chase, hubby Paul and Louie the lab enjoying the snow!

For the chilli
500g minced beef
Red pepper diced
Onion sliced
Passata 500g carton (Lidl)
Tin kidney beans
Tin baked beans
Tsp cumin
Tsp chilli powder
Tsp paprika
300ml beef stock (oxo and water)

Fry off the mince and drain off the fat
In a pan with some oil add the pepper and onion and cook on medium heat for about 10 minutes with the cumin, chilli and paprika
When the onion and pepper are soft add the drained mince, passata, beef stock and give a good stir
Add both tins of beans and leave to simmer for at least 20 minutes serve as suggested above!
Its that easy...Here are some more of my snow pictures to enjoy


Louie is such a poser

Wednesday, 13 January 2016

Barbeque bean bake that won't break the bank

Try saying that after a few...Okay so this one is thanks to the fantastic Jamie Oliver and his money saving meals however I have tweaked it slightly and you are welcome to do the same. That's the secret to cooking, there is no right or wrong, just somebody else's way and yours! I also did this with Jamie's cheesy croutons (ciabatta torn into chunks, cheese grated over the top and oven for 20 minutes at 180) however, with the jacket potato as well, it was a bit too much for me. I would suggest these deliciously smoky, sweet beans with either the jacket potato and some salad, maybe as a spicy version of beans on toast with the ciabatta halved and grilled or throw in some sausages! Have fun with it, throw in the remains of the tomato pasta sauce that's been sitting in the fridge all week (I did) Also the best part, it's good for you! I used good old baked beans for this but you could use kidney, cannellini, mixed beans, any you like.
2 tins baked beans
2 carrots chopped
2 red onions sliced
500ml passata (It's just tomato sauce, use chopped tomatoes if you like)
100ml bbq sauce (I'm intrigued to know how brown sauce would taste with this too!)
Tsp cumin powder (Leave it out if you haven't got it)
Tsp chilli powder/flakes
1 and half tsp paprika
Rosemary
4 large potatoes 
Preheat the oven to 180
Pierce the potatoes, rub the skins in oil, sprinkle on some salt and place in the oven on a baking tray
Place the chopped carrots, onions, rosemary, spices and a drizzle of oil in a roasting tray and put in the oven for 20 minutes
They should be nice and sticky and soft
Pour on the beans, tomato and bbq sauce and give it all a stir before returning to the oven for 40 minutes
It should be reducing nicely now, stir it again (if you are having the croutons stick them in now) and return for 20 minutes when everything should be ready together. 
Don't blame me for the aftermath....you know what they say.....beans, beans good for the heart...


Tuesday, 12 January 2016

Healthy and humble honey and lemon chicken

This is a delicious meal that is not only cheap and yummy, wait for it.....it's healthy too! So if there are any of you wanting to lose pounds, not money, and you don't want to spend a lot, or sacrifice taste either, then this is for you. If you don't have fresh rosemary, use dried. If you don't have any dried rosemary, use thyme, if you don't have that then leave it out, it doesn't matter. I've tried all ways and all are as tasty. I serve this with garlic potatoes and salad (I know I said it's winter, however coupled with the warm honey and lemon sauce it's a must) I've always found when I eat this I'm full, even though it doesn't look a lot, as it takes longer to eat with having to pick at the chicken. The kids love it too...bonus!
1Kg chicken thighs
2 lemons
5 cloves of garlic
Rosemary
Tbsp honey
Baby potatoes
Bag of salad
Preheat the oven to 200
Place potatoes, unpeeled garlic cloves and some rosemary in a pan and cover with water
In an oven proof dish put the chicken and lemons and rosemary together
Pour over the honey and squeeze the juice out of the lemons (leaving the lemon in the dish to cook with the chicken)
Put the chicken in the oven for 50 minutes 
After the chicken has been in for 30 minutes baste with the juices and leave to cook for a further 20 minutes 
Turn the potatoes on to boil for 20 minutes
When the potatoes are soft and cooked drain off and remove the garlic
Gently squeeze the cloves and the garlic should easily pop out of it's skin
Season generously with salt and pepper and mash with a fork
Coat the potatoes with the garlic and some butter 
When the chicken is cooked drain off the juice into a small pan on a high heat and boil
Serve on the salad with the potatoes and pour over the sauce 


Monday, 11 January 2016

Simple steak and ale pie

I actually thought I had already blogged this, my memory is terrible at the moment, something I'm blaming on the kids. I just have to walk through a door and my memory is wiped clean. So my steak and ale pie is a delicious winter warmer, don't forget it is actually still winter put those salads away!! As with the beef bourguignon, it really doesn't matter what beer you use. For mine I used the cheapest bottle I could get my hands on, Golden goose 90p from Lidl and it tasted yummy! Perfect served with mashed sweet potato and some greens.
350g diced stewing steak
250g mushrooms chopped
Onion chopped
500ml bottle ale/beer/stout whichever you like
Tbsp tomato puree (leave it out if you have none it doesn't matter)
Flour tbsp
Oil tbsp
Puff pastry


Coat the meat in flour and pepper
On a high heat brown the meat in the oil
When the meat's browned place into a large pan and pour over the beer, add some water if not covered
In the frying pan cook the mushrooms and onions for 5 minutes and add to the pan with the meat
Stir in the tomato puree and place on a medium heat until simmering
Turn down low and leave for a couple of hours remembering to stir so it doesn't burn
If the liquid is not as thick as you want it after it's been cooking then add some gravy granules
Pour the mixture into an oven proof dish and top with puff pastry
Cook in a preheated oven at 200 for 25-35 minutes or until pastry is golden

Tuesday, 29 December 2015

Posh nosh for less dosh!


Firstly, let me take this opportunity to thank you all for taking the time to read my posts and wish you all a very merry Christmas and a happy new year! I hope none of you are planning on rushing out and buying the latest exercise gimmicks for the new year, new you con, as I will be doing healthy lifestyle for less posts in January. As promised on my Facebook page, I'm going to share my goats cheese tart with you, definitely not for slimming this one. It's not the cheapest as the goats cheese was £1.70 per person however the end result is nothing short of spectacular (if you like goats cheese that is, otherwise it will be gross!) A child could put it together it's very simple. The onion relish is the perfect accompaniment. Another fancy looking meal that's easy to throw together for a special occasion costing very roughly £2.00 per person it's a cheap alternative to eating out!

4 circles of goats cheese
Block of puff pastry
4 small/med red onions
2 tbsp sugar (I use brown but white will work to)
2 tbsp balsamic vinegar
20g butter
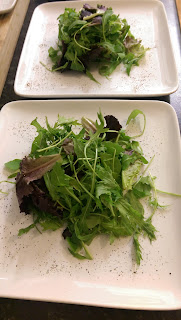
Salad to serve
Preheat the oven to 200 and place a handful of salad on each plate
Stand the goats cheese on the rolled out puff pastry and cut a circle an inch wider than the cheese, as you can see I did a cheddar and tomato one for my son Chase
Scrunch (it's a technical term) the pastry around the sides of the cheese so it's surrounded
Season with pepper
Place in the oven for 30 minutes or until the cheese is golden
While the tarts are cooking slice your red onions and place them in a frying pan with the butter on a med/high heat
Add the sugar and balsamic and cook until sticky and soft
All that's left is to plate up make pretty and enjoy!


Wednesday, 23 December 2015

Triple choc chip cookies


Don't you just love those cookies you get in the supermarkets. The ones in the paper bags, all gooey and chewy. They usually have a named sweet in them like Rolo or Smarties. Well I made some last night that tasted as good, if not better than those! They were a chocoholics dream. Triple chocolate cookies, verging on the consistency of a brownie in the middle and crispy on the outside, generously filled with chocolate chips. If you want to recreate the supermarket ones then replace the chocolate chips in the recipe for your chosen sweet, I can't wait to experiment! I'm going to try replacing the chocolate I used for chocolate orange for my next batch. Throw some nuts or oats in for a different texture, whatever you decide on let me know on my Facebook page How to be hard up and happy! I'd love to see your results.

150g plain flour sifted
100g chocolate melted (whichever you want)
200g chocolate chips or whatever chocolate sweets you want (from the fridge)
30g cocoa powder sifted
120g butter softened
75g brown sugar
50g white sugar
1/2 tsp bicarbinate of soda
1/2 tsp salt
Large egg beaten (from the fridge)

Preheat the oven to 170
In a bowl combine the flour, cocoa, salt and bicarbinate of soda
With a mixer if you have one (by hand is fine too it will give your arms a good workout!) cream together the butter and both sugars until light and fluffy (or until your arm feels like it's going to drop off) then add the melted chocolate and mix again until combined
Beat in the cold egg and add the dry ingredients
Fold in first, so the flour mix doesn't go everywhere, then mix
Once mixed stir in the chocolate chips/ sweets you are using
Using an ice-cream scoop or a spoon if you don't have one, dollop large amounts onto a greaseproof lined tray
                                  
No need to shape them just dollop and bake for 18 minutes
They will seem undercooked but I promise you they're ready 
Leave to cool for 5 minutes, this is the hardest part, it takes real willpower after smelling the chocolate wafting through the house
All that's left is to enjoy them with an ice cold glass of milk, or ice-cream, or cream, or.....just enjoy them
Here's my son Chase enjoying his this morning


Saturday, 12 December 2015

Christmas bomb

Don't like Christmas pudding? Like rocky road? Try this for dessert on Christmas day. You can put what you want in it, it's entirely up to you. I had some mini marshmallows and bits of chocolate left from our hot chocolate bar the other week and my daughter gave me (not even begrudgingly) a couple of her mini Mars bars to throw in too. The last time I made this I made my own honeycomb (You-tube tutorial to follow soon!) but you could try fruit or nuts, anything at all. You start with plain old vanilla ice-cream, again, you could use a different flavour, and basically add to it what you want. I poured melted white chocolate over mine to look like white sauce on a Christmas pudding but you could use any chocolate and any swiss roll for that matter! But if you want to recreate mine here's what I used.

Chocolate swiss roll
3/4 litre vanilla ice-cream
Mini marshmallows
2 mini Mars bars sliced
50g white chocolate broken
50g milk chocolate broken
100g white chocolate melted for top
                                       
Slice the swiss roll into slices 1 cm thick and line a bowl with cling film 
                                     
Get a child (any will do) to bash up the chocolate into pieces (works even better if they're in a mood)                                      
Place the slices of swiss roll into the bowl
                                     
Place the ice-cream, marshmallows, chocolate and Mars pieces into a bowl (or mixer) and combine                                          
Scoop the ice-cream mix into the swiss roll lined bowl and tighten the cling film around the top
Place into the freezer preferably with a side plate on top with something weighing it down
After at least 2 hours turn it out onto a plate pour on the melted white chocolate, decorate and serve
A wow factor for any Christmas party!


Tuesday, 8 December 2015

Please yourself pie

Firstly I would like to say thank you to those of you reading my blog and trying out my recipes. I've had nearly 5000 views and I'm over the moon to think I may be helping some of you live a bit cheaper. In these frankly miserable days where the news throws out so much negativity, we really do need to spread some cheer! Now this recipe is great for using leftover turkey, as well as chicken, and is very tasty! It's cheap to make and very filling too. If you don't eat it all it's great cold the next day! You can pretty much throw in anything to fill it out, please yourself, if you have leftover stuffing , put that in, or some sausages need using up, throw them in. You could add cream or creme freche to make it a bit richer we had it without and it was still delicious. It's your pie put what you want in but the base is chicken/ turkey and leeks.

Leftover chicken/ turkey meat (I actually used a full chicken that was reduced to £2.79 in Lidl)
2/4 leeks sliced
Tsp dried thyme
3 rashers smoky bacon/ streaky whichever you have/want
150g mushrooms
1 pt chicken stock
Tbsp flour
Ready rolled puff pastry

Add chopped leeks to a pan with a nob of butter on a medium heat and sweat, with the lid, on stirring occasionally for about ten minutes.
Fry your chopped bacon strips on a high heat with the thyme and mushrooms.
Transfer the bacon and mushrooms into the leeks and stir in the flour until dissolved.
To deglaze the bacon pan, put it back on the heat and pour in some of the stock until any residue has dissappeared.
Pour all the stock into the pan with the leeks, not forgetting the stock from the frying pan with the flavour from the bacon!
Stir in the meat until it's bubbling nicely and simmer for ten minutes.
Transfer into an oven proof dish and top with the pastry.
Score some nice diagonal lines with a knife and if you want a golden pastry brush with beaten egg (it doesn't matter if you don't do this it just looks nicer)
Put into a preheated oven at 180 for 30-40 minutes or until the pastry is golden.


Thursday, 26 November 2015

Sticky toffee apple cake


I had a few of the apples left over that we had picked a few weeks back and they were just about past their best. There was not much point making a massive batch of chutney when only me and my dad like it and I couldn't be bothered peeling them for a crumble. Only one thing for it, my sticky toffee apple upside down cake! This is deliciously moist oozing with caramel sauce and if you want to be really naughty then a dollop of freshly whipped cream is the way to go! As you don't have to peel the apples it's a lazy, low cost, delicious pudding....just don't blame me for the calories.

For the caramel sauce you will need:

200g butter
200g sugar (I used brown but you can use white if you haven't got brown)
2 tbsp golden syrup

For the cake:

4-6 eating apples cored and chopped up 
125g butter
125g sugar
2 eggs
225g self raising flour
1/2 tsp bicarbinate of soda
200ml milk
Place the sauce ingredients into a pan on a medium heat and stir until dissolved bring to the boil and simmer.
Place the apples into the sauce and turn to a low heat while you make your cake mix.
Grease a 24cm round cake tin and pre heat the oven to 180.
Cream together the butter and sugar until fluffy in a bowl with a wooden spoon.
Adding the eggs one at a time mix them all together, (don't forget the apples keep giving them a stir so they don't catch.)
Sift the half of the flour and bicarb into the cake mix with the milk.
Fold it all together then add the rest of the flour.
Take the apples out of the pan with a slotted spoon, so you leave most of the sauce in the pan, and put them into the cake tin
Pour the batter on top of the apples and smooth over.
Place on a baking tray in case any syrup spills over and leave in the oven for 35-40 minutes, or until a skewer comes out clean of the sponge mix.
Leave to stand for just ten minutes (no longer) and turn out, holding a plate over the top and flipping over confidently and you should be left with this....
To serve heat up your sauce you can add some cream to the sauce if you like to make it more caramel like and serve with a dollop of whipped cream.